


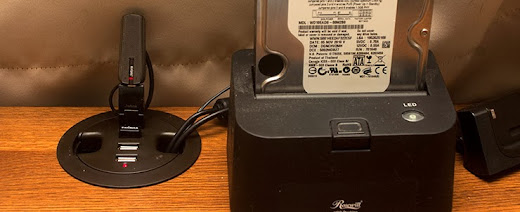
I decided to mount the In-Desk Hub to the return of my desk. It solves a couple of problems I was having. First, it obviously gives me additional USB ports which are easy to access for the times I need to plug-in a thumb drive, camera, charge my bluetooth headset, etc. without having to reach around to the back of my computer. Second, it acts as a traditional desk grommet which allows me to run some cables from peripherals on top of my desk return to my computer chassis underneath it. I've been trying to be neater with my cable management.
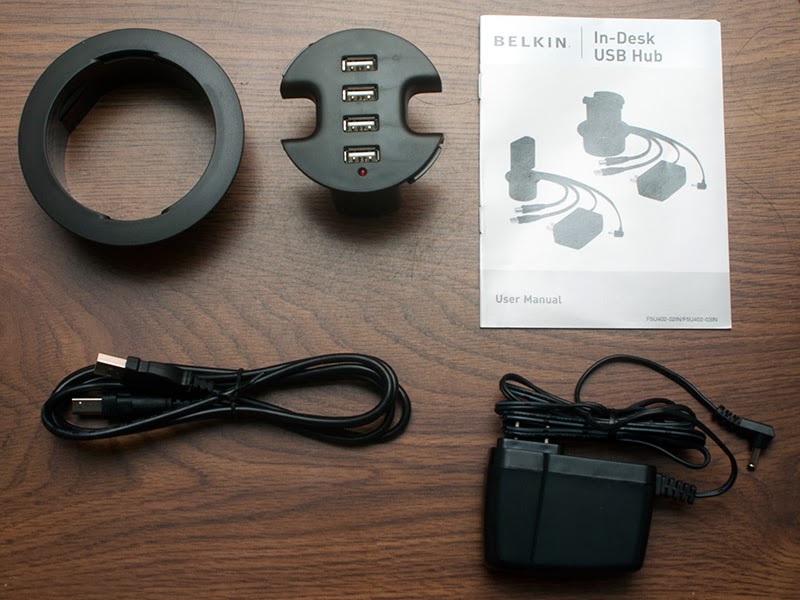
The 3" In-Desk USB Hub kit comes with a 3" grommet, 4 port powered USB Hub that fits in the desk grommet, USB cable and power adapter.
The USB Hub will work without the power adapter being pulled and just off of the power from the USB port you connect it to. For devices that draw more energy, such as external hard drives, you can choose to plug in the Hub.
Belkin also makes a smaller 2" In-Desk USB Hub
I chose the Belkin because I've used their products in the past and have always been pleased. I saw another model that also
What You'll Need
Materials
- 3" Belkin In-Desk Hub (or 2" In-Desk Hub)
- Labels
Tools
- Drill
- 3" Hole Saw bit (or 2" if using 2" hub)
Step 1: Make the Hole
Start by determining where you would like to mount the USB hub in your desk top. The location should be convenient and not in the way of other items you plan on putting on this area of your desk. Also check underneath the desk to make sure there are no obstructions to interfere with the installation or cables.
Use the hole saw in your drill and make the hole. If possible it's best to start the hole from underneath but don't cut all the way through. Once the drill bit portion of the hole saw emerges on the desk top, stop drilling, pull out the hole saw and finish up the hole from the top. This will give you a cleaner cut. If you just drill from the top, like I did, the hole has some imperfections along the edge but these will be covered up by the grommet.

Step 2: Install the Grommet
Next, slide the grommet into the hole. It wasn't fitting very tight for me so I cut up a wide rubber band into 4 pieces and positioned them in the hole before sliding the grommet in to get a tighter fit.
There are a couple of indentations around the rim of the grommet. These need to be orientated so they are at the 3 o'clock and 9 o'clock positions. You can make minor adjustments from underneath after the hub is installed.

Step 3: Prepare Hub
It's much easier to feed the cables from the top than trying to make the connections from the bottom. Before mounting the USB hub in the grommet I attached the USB and power cables to the bottom of the hub. With the 3" Hub you can slide the power adapter through the grommet but I'm not sure if you can with the 2" version.
I also like to label the adapter and end of the USB cable. It makes it easier to make changes in the future.

Step 4: Insert Hub Into Grommet
Carefully fish the power adapter and USB cable through the grommet then slide the USB Hub into the grommet. There are two tabs on the hub that fit into the left and right indents on the grommet. Once you have inserted the hub's tabs into these indents, twist the hub clockwise to lock it in place.
If you're grommet isn't tight you may need to hold the bottom of the grommet from underneath.
Next just plug the hub into a free USB port on the back of your computer and the power adapter into an outlet and you're set. Remember, the power adapter is optional. If you're not going to be using devices that require a lot of power you don't need to plug it in.


